In the Part 1 of AlloyDB Blog Series, I discussed the Introduction of AlloyDB for PostgresSQL. Then in Part 2 of the blog series, I discussed how to do the installation of AlloyDB Omni in a GCE VM. In Part 3 of the blog series, I discussed how to connect to AlloyDB Omni using psql and pgAdmin. In Part 4 of the blog series, I discussed how to load TPCH data into the AlloyDB Omni instance and check out AlloyDB Omni’s columnar engine. In Part 5 of the blog series, I covered topic of Compare AlloyDB Omni with PostgreSQL. In Part 6 of the blog series, I will discuss how to create an AlloyDB cluster on GCP and how to connect using several different approaches, including one approach from my laptop.
Unlike AlloyDB Omni that customer needs to manage this standalone database, AlloyDB is a fully managed, PostgreSQL-compatible database running on GCP, supporting both transactional and analytical workload. It provides enterprise-grade performance and 99.99% availability targeting organizations that require to migrate, modernize, or build commercial-grade applications. AlloyDB is suitable for applications that require high transaction throughput, large database sizes, or multiple read resources; scale existing PostgreSQL workloads with no application changes; and modernize legacy proprietary databases.
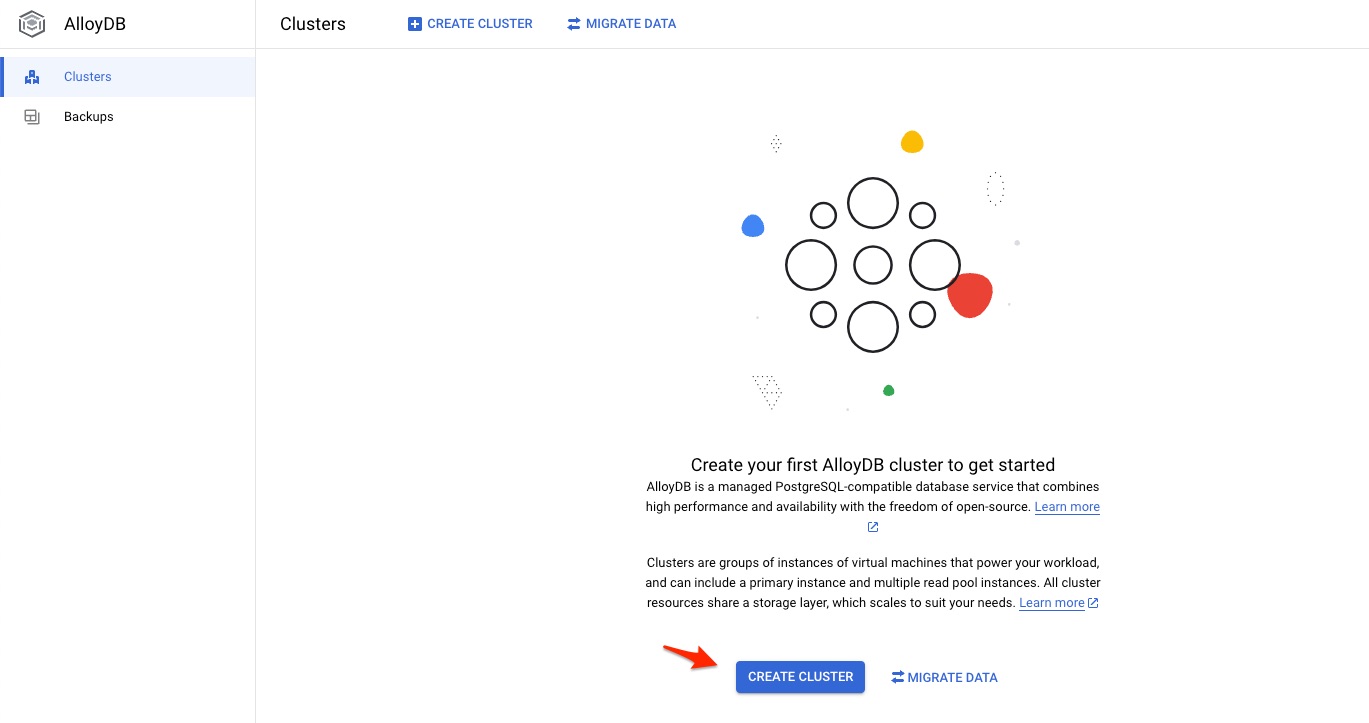
Create AlloyDB Cluster
In the AlloyDB menu, click CREATE CLUSTER.
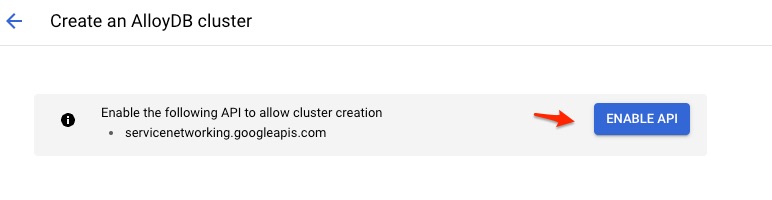
The ENABLE API shows up. Click it.
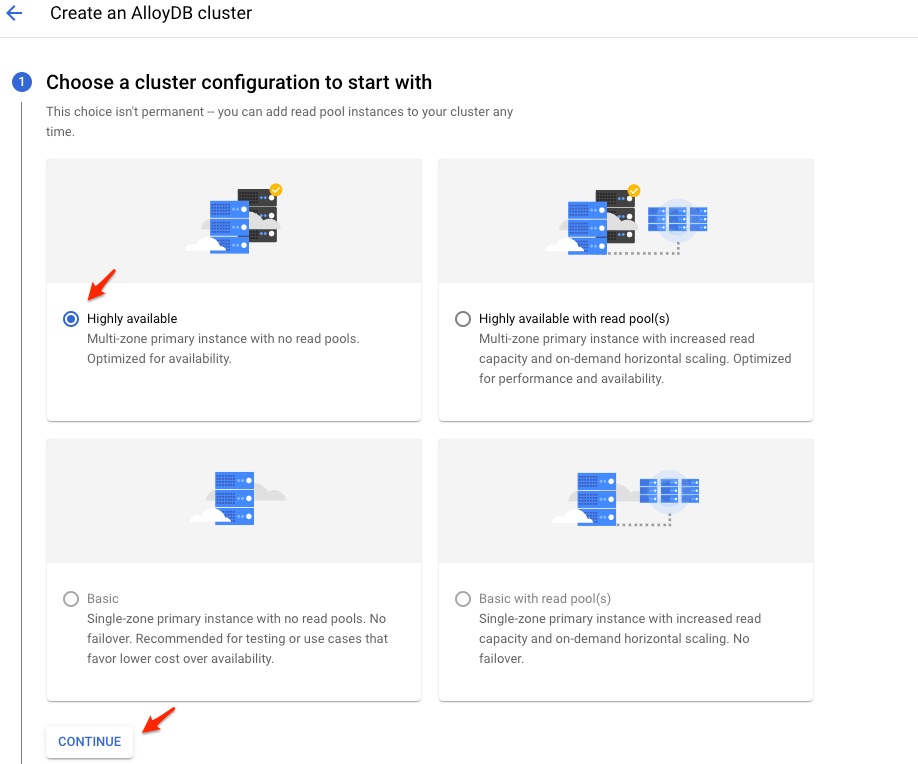
There are four types of cluster configuration. Obviously Highly available or Highly available with read pool(s) are best for enterprise level configuration. For my test, I want to click Basic, but it was greyed out. So I chose Highly available, then click Continue.
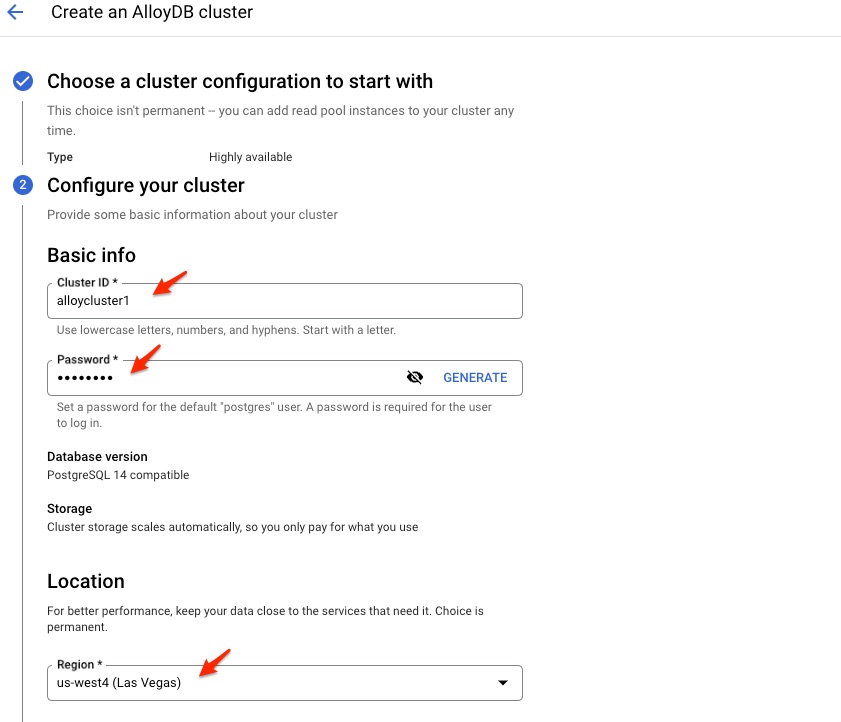
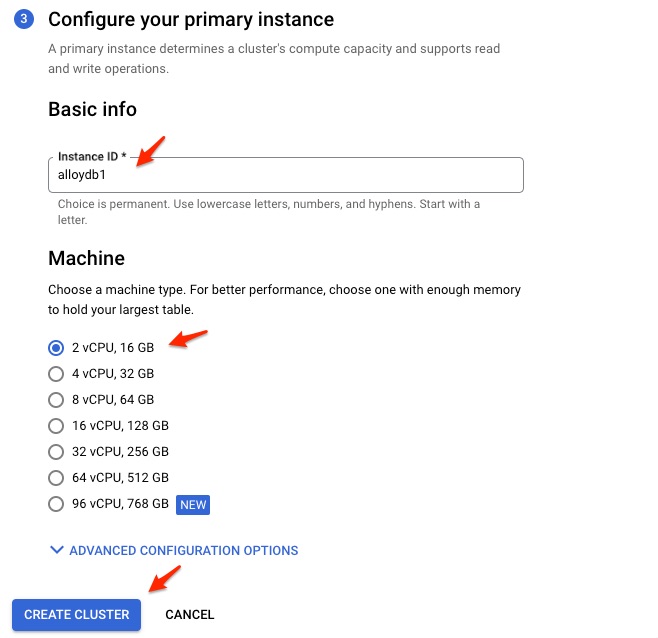
Input the cluster ID, password, and choose a region.
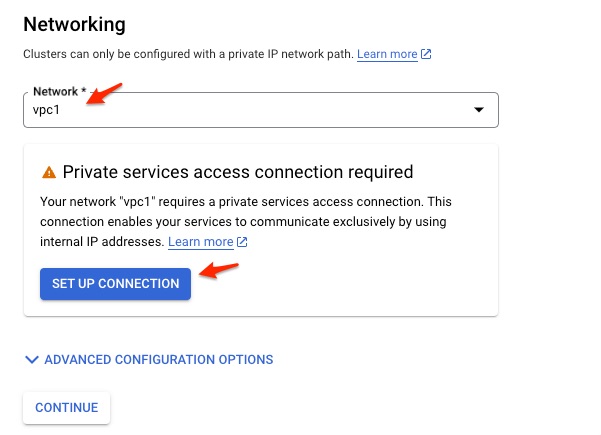
Choose my VPC. At this moment, a new screen pops up to require set up Private Service Access Connection. Because AlloyDB service is in a different network owned by Google. To avoid the traffic to the AlloyDB goes through internet, private service access allows VM instances in my VPC (in this case, vpc1) to communicate with AlloyDB service via private IP.
Click SET UP CONNECTION
Setting up private service access connection requires you to specify an IP address ranges for services. Make sure this IP address range does not overlap with any existing ranges, subnets, or custom static routes.
When Enable screen shows up, click ALLOCATE A NEW IP RANGE
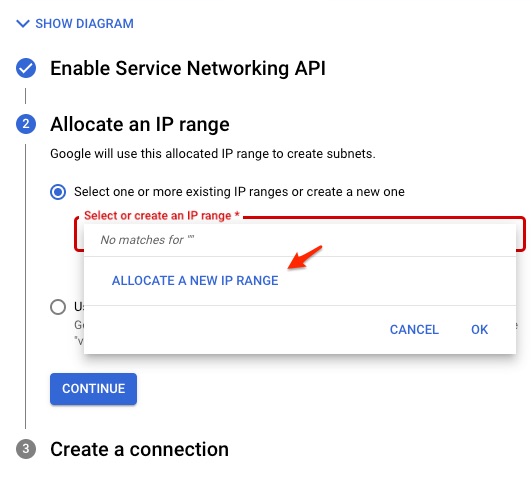
I gave a name of alloydb with IP range of 10.15.0.0/16, then click CONTINUE. Please note: name must use lower case, can not use any uppercase character in the name.

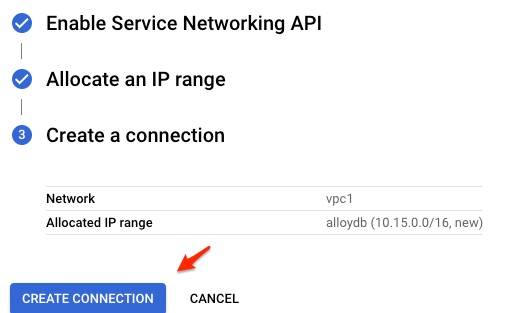
Click CREATE CONNECTION.
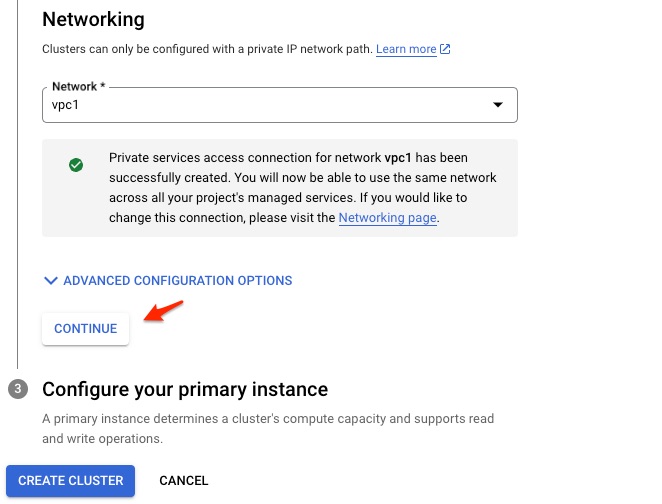
Once the private service access connection is created, click CONTINUE.
Give the name of Instance ID and machine type. I chose the smallest type from the list.
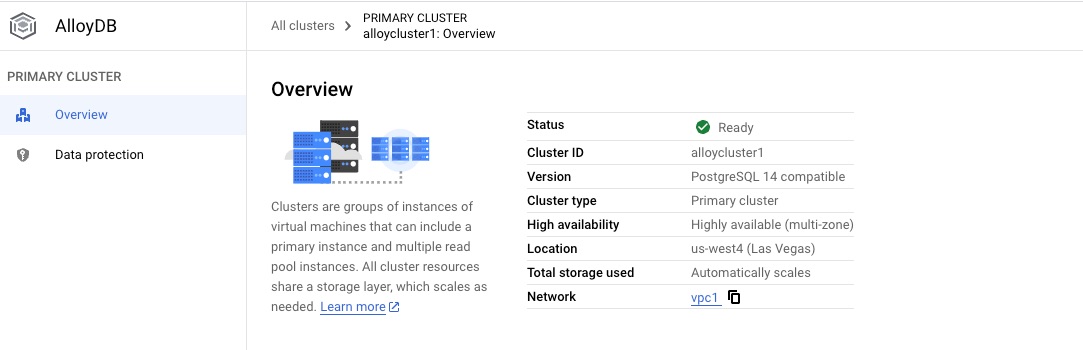
It will take about 8 to 10 minutes to create the cluster. Here is the screen looks like when it is ready.
In case you see an error of “Instances in cluster failed to create“. Just click CREATE PRIMARY INSTANCE, then re-input the instance name of alloydb1 and 2 CPU with 16 GB memory.

Once the cluster was create, let check out a few things:
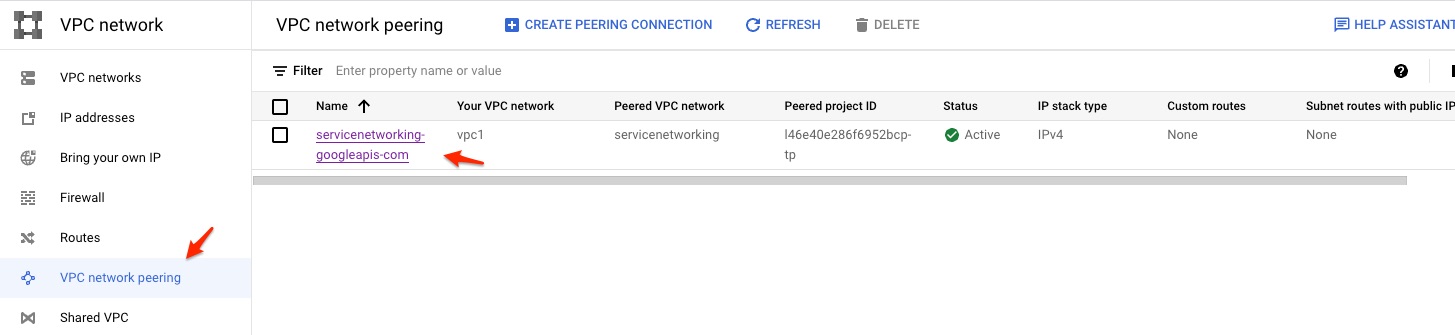
Remember the private service access connection, I can actually see it from menu VPC Network -> VPC network peering.
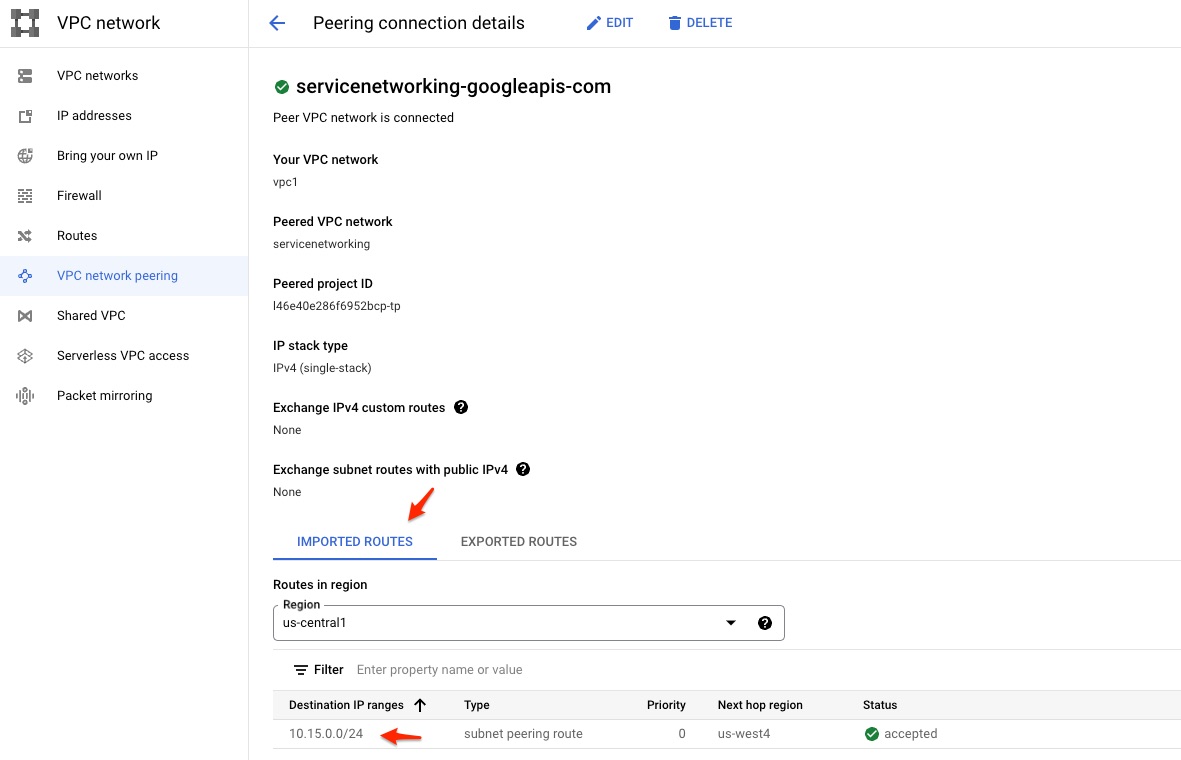
A little more detail about the peering.
If I want to add a reader instance, I can click ADD READ POOL INSTANCE to add one.

You can also run command gcloud beta alloydb instances list to check out the status of the AlloyDB cluster. Next we will discuss how to connect to AlloyDB
Configure AlloyDB via psql Client
As the VMs in the same VPC should have direct access to the AlloyDB cluster, I will reuse the pgdb VM instance from the Part 5 of blog series: Compare AlloyDB Omni with PostgreSQL.
This one is pretty straight forward with the following psql command running from pgdb vm.
[pguser@pgdb ~]$ psql -d postgres -U postgres -h 10.15.0.8
Password for user postgres:
psql (15.2, server 14.7)
SSL connection (protocol: TLSv1.3, cipher: TLS_AES_256_GCM_SHA384, compression: off)
Type "help" for help.

postgres=> \conninfo
You are connected to database "postgres" as user "postgres" on host "10.15.0.8" at port "5432".
SSL connection (protocol: TLSv1.3, cipher: TLS_AES_256_GCM_SHA384, compression: off)
Configure AlloyDB via Auth Proxy
AlloyDB Auth Proxy provides several benefits than the above psql direct connect approach, such as use IAM based principal to authorize the DB connections as well as automatic 256-bit AES encryption over TLS 1.3. This is how it works.
When an application connect to Auth Proxy, if there is no connection exist, then it calls AlloyDB Admin API to obtain an ephemeral SSL certificate and connect to AlloyDB. The SSL certificate expires in 24 hrs, but Auth Proxy will automatically refreshes it before it expires. The AlloyDB Auth Proxy connect to AlloyDB instance ONLY on port 5433. So make sure to have an outbound firewall policy on the client machine to allow outgoing connect to port 5433 to AlloyDB instance IP. All egress TCP connections on port 443 must be allowed as well.
Get Key for the Service Account
For simplicity, I just use my Compute Engine default service account and generate the key for this account with the fiile name of mykey.json.
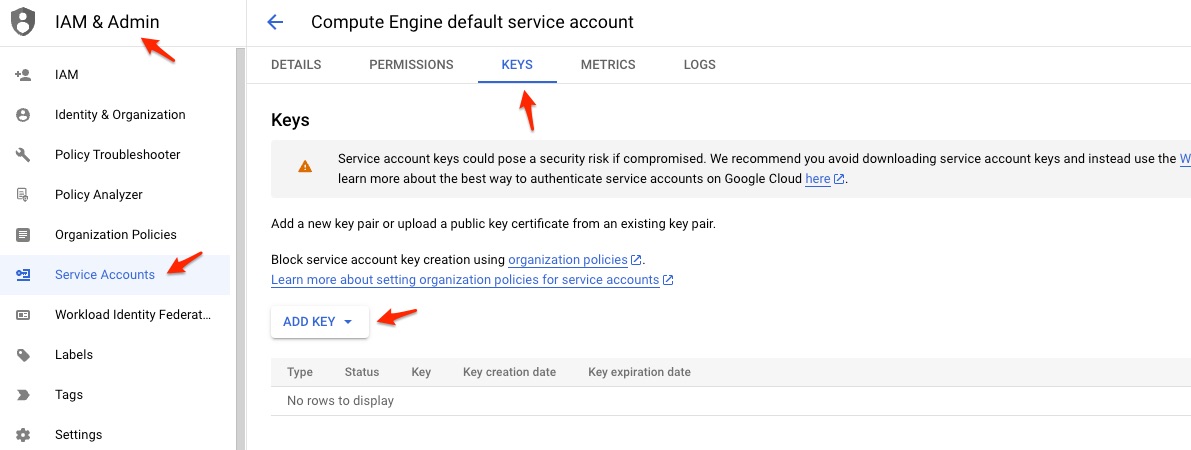
Click ADD KEY, then choose JSON key type. Save the file and use it later on.
Download and Configure Auth Proxy
Run the following command to download Auth Proxy as root user.
wget https://storage.googleapis.com/alloydb-auth-proxy/v1.3.1/alloydb-auth-proxy.linux.amd64 -O alloydb-auth-proxy
chmod +x alloydb-auth-proxy
Then copy the JSON key file, mykey.json to the same folder. I will use a new port of 5566 instead of default port 5432. Execute the follow command to start Auth Proxy.
./alloydb-auth-proxy "projects/<your project id here>/locations/us-west4/clusters/alloycluster1/instances/alloydb1" --credentials-file mykey.json --port 5566 --address 0.0.0.0Use the same IAP TCP Forwarding approach used in part 3 Connect to AlloyDB Omni and run the following command:
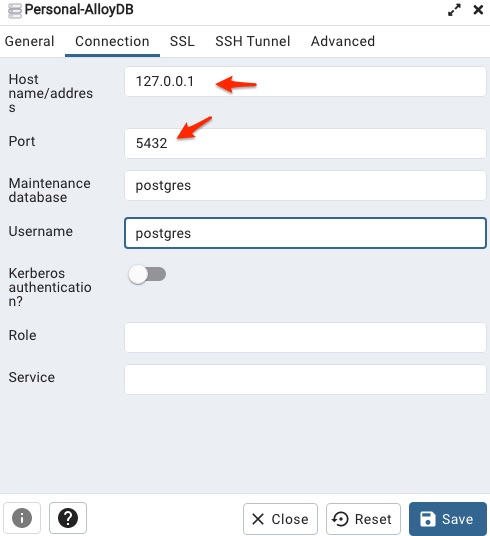
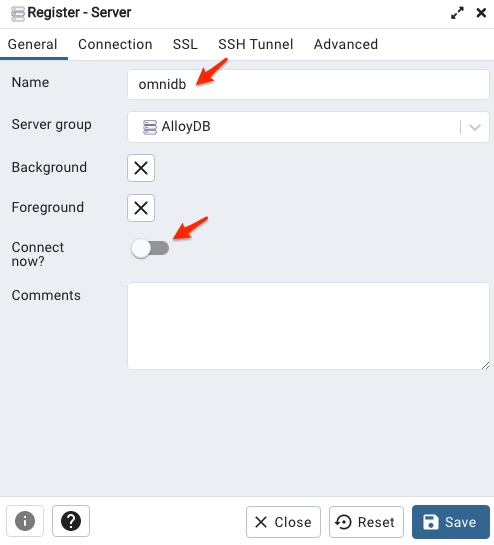
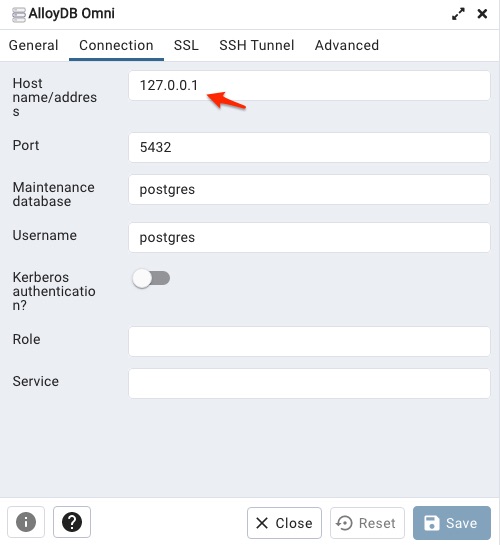
gcloud compute ssh pgdb --ssh-flag="-L 5432:127.0.0.1:5566" --zone us-west4-b Ok, right now I should be able to connect to the database on AlloyDB cluster by doing the following configuration in pgAdmin on my laptop.
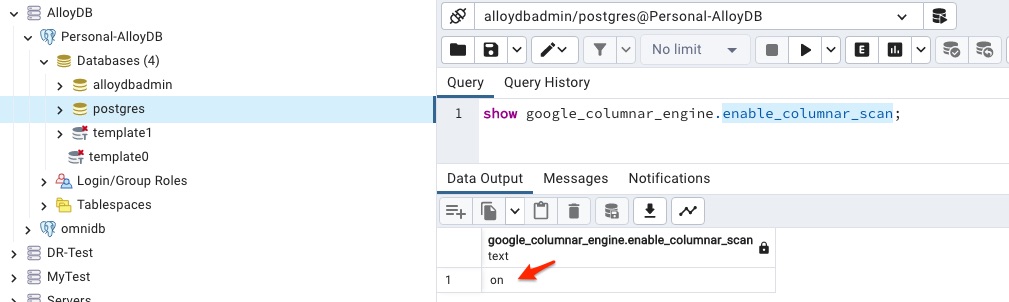
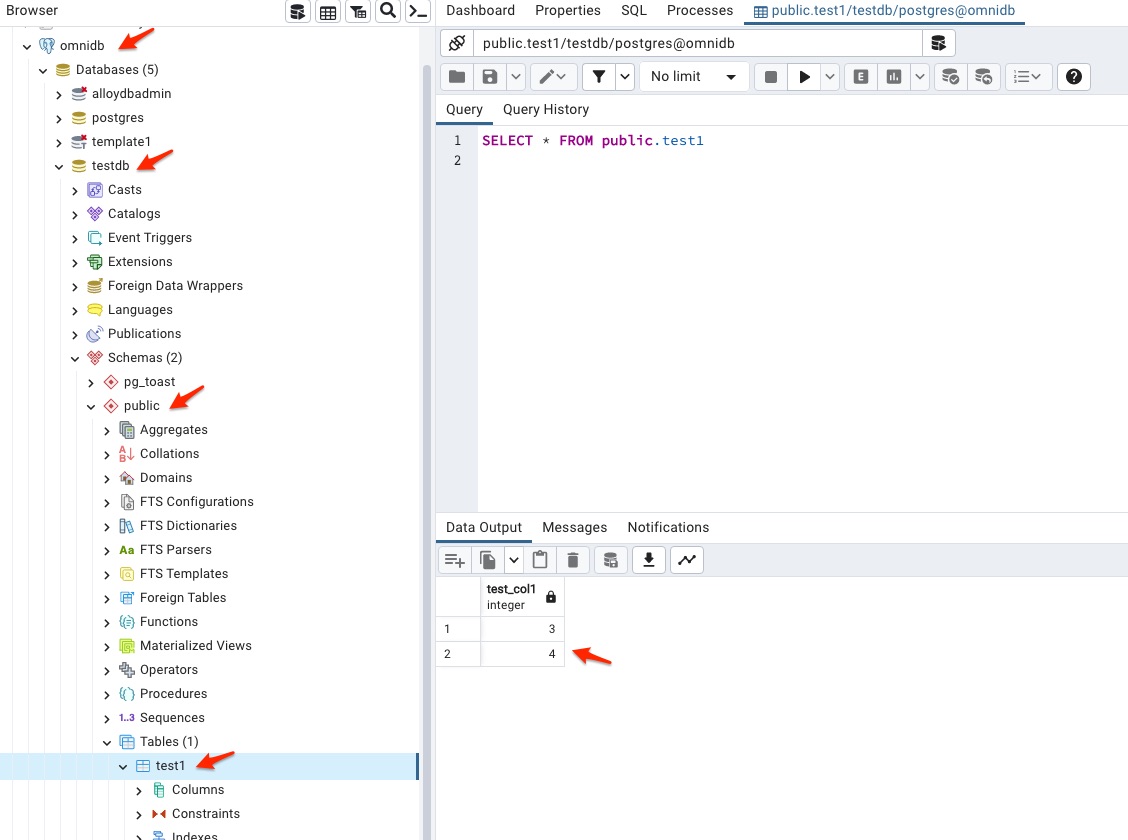
By default, enable_columnar_scan parameter is on.
Ok, we are done with the installation and configuration of AlloyDB. In the next blog, I will discuss more in detail about AlloyDB internals.

You must be logged in to post a comment.