
Oracle Big Data SQL is part of Oracle Big Data family. It allows users to use regular Oracle SQL to access data in Oracle database, Hadoop and other sources at the same time. Recently I installed the new version of Oracle Big Data SQL (BDSQL) v3.0 on two different systems:
- An X3-2 Full Rack Big Data Appliance (BDA) connecting with an X3-2 Quarter Rack Exadata. This BDA is non-kerberosed.
- An X6-2 Starter Rack BDA connecting with an X6-2 Eighth Rack Exadata. This BDA is kerberosed.
Unlike previous previous BDSQL, the installations of this version of BDSQL on both systems are relatively smooth and straight forward. I list the installation steps as follows:
Prerequisite
- The BDA’s version is at least 4.5.
- The April 2016 Proactive Bundle Patch (12.1.0.2.160419 BP) for Oracle Database must be pre-installed on Exadata.
BDSQL requires the installation on both BDA and Exadata. Perform the installation on BDA first, then Exadata next.
BDA Installation
Run bdacli command to check whether BDSQL is enabled or not on BDA.
[root@enkbda1node01 ~]# bdacli getinfo cluster_big_data_sql_enabled
true
If not enabled, run the following command:
[root@enkbda1node01 ~]# bdacli enable big_data_sql
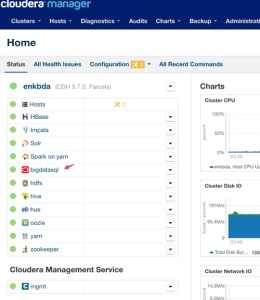
After BDSQL is enabled on BDA, you should able to see the service on BDA’s Cloudera Manager.
Logon as root user on Exadata DB Node 1.
Step 1: copy bds-exa-install.sh file from BDA to exadata
[root@enkx3db01 ~]# mkdir bdsql
[root@enkx3db01 ~]# cd bdsql
[root@enkx3db01 bdsql]# curl -O http://enkbda1node01/bda/bds-exa-install.sh
  % Total    % Received % Xferd  Average Speed   Time    Time     Time  Current
                                 Dload  Upload   Total   Spent    Left  Speed
100 40258  100 40258    0     0  13.6M      0 --:--:-- --:--:-- --:--:-- 38.3M

[root@enkx3db01 bdsql]# ls -l
total 40
-rw-r--r-- 1 root root 40258 Sep 28 07:04 bds-exa-install.sh
Step 2. Change the ownership of the script and bdsql directory.
We need to use oracle user for the installation.
[root@enkx3db01 bdsql]# chown oracle:oinstall bds-exa-install.sh
[root@enkx3db01 bdsql]# chmod +x bds-exa-install.sh
[root@enkx3db01 bdsql]# ls -l
total 40
-rwxr-xr-x 1 oracle oinstall 40258 Sep 28 07:04 bds-exa-install.sh
[root@enkx3db01 bdsql]# cd
[root@enkx3db01 ~]# chown oracle:oinstall bdsql
Step 3. Perform the installation
Logon as oracle user, not root user. Set the environment as follows:
export ORACLE_HOME=/u01/app/oracle/product/12.1.0.2/dbhome_1
export ORACLE_SID=dbm1
export GI_HOME=/u01/app/12.1.0.2/grid
export TNS_ADMIN=/u01/app/12.1.0.2/grid/network/admin
echo $ORACLE_HOME
echo $ORACLE_SID
echo $GI_HOME
echo $TNS_ADMIN
Run the installation script.
[oracle@enkx3db01 ~] cd bdsql
oracle:dbm1@enkx3db01 bdsql > ./bds-exa-install.sh
bds-exa-install: setup script started at   : Wed Sep 28 07:23:06 SGT 2016
bds-exa-install: bds version               : bds-2.0-2.el6.x86_64
bds-exa-install: bda cluster name          : enkbda
bds-exa-install: bda web server            : enkbda1node01.enkitec.local
bds-exa-install: cloudera manager url      : enkbda1node03.enkitec.local:7180
bds-exa-install: hive version              : hive-1.1.0-cdh5.7.0
bds-exa-install: hadoop version            : hadoop-2.6.0-cdh5.7.0
bds-exa-install: bds install date          : 09/24/2016 05:48 SGT
bds-exa-install: bd_cell version           : bd_cell-12.1.2.0.101_LINUX.X64_160701-1.x86_64
bds-exa-install: action                    : setup
bds-exa-install: crs                       : true
bds-exa-install: db resource               : dbm
bds-exa-install: database type             : RAC
bds-exa-install: cardinality               : 2
************************
README--README--README--README--README--README--README--README--README--README
************************
Detected a multi instance database (dbm). Run this script on all instances.
Please read all option of this program (bds-exa-install --help)
This script does extra work on the last instance.  The last instance is determined as
the instance with the largest instance_id number.
press <return>

bds-exa-install: root shell script         : /u01/app/oracle/product/12.1.0.2/dbhome_1/install/bds-root-enkbda-setup.sh
please run as root:

/u01/app/oracle/product/12.1.0.2/dbhome_1/install/bds-root-enkbda-setup.sh

waiting for root script to complete, press <enter> to continue checking.. q<enter> to quit
Open another session, run the following command as root user.
[root@enkx3db01 ~]# /u01/app/oracle/product/12.1.0.2/dbhome_1/install/bds-root-enkbda-setup.sh
bds-root-enkbda-setup.sh: enkbda: removing existing entries for 192.168.9.1 from /etc/hosts
bds-root-enkbda-setup.sh: enkbda: removing existing entries for 192.168.9.2 from /etc/hosts
bds-root-enkbda-setup.sh: enkbda: removing existing entries for 192.168.9.3 from /etc/hosts
bds-root-enkbda-setup.sh: enkbda: removing existing entries for 192.168.9.4 from /etc/hosts
bds-root-enkbda-setup.sh: enkbda: removing existing entries for 192.168.9.5 from /etc/hosts
bds-root-enkbda-setup.sh: enkbda: removing existing entries for 192.168.9.6 from /etc/hosts
bds-root-enkbda-setup.sh: enkbda: added entry "192.168.9.1 enkbda1node01.enkitec.local    enkbda1node01" to /etc/hosts
bds-root-enkbda-setup.sh: enkbda: added entry "192.168.9.2 enkbda1node02.enkitec.local    enkbda1node02" to /etc/hosts
bds-root-enkbda-setup.sh: enkbda: added entry "192.168.9.3 enkbda1node03.enkitec.local    enkbda1node03" to /etc/hosts
bds-root-enkbda-setup.sh: enkbda: added entry "192.168.9.4 enkbda1node04.enkitec.local    enkbda1node04" to /etc/hosts
bds-root-enkbda-setup.sh: enkbda: added entry "192.168.9.5 enkbda1node05.enkitec.local    enkbda1node05" to /etc/hosts
bds-root-enkbda-setup.sh: enkbda: added entry "192.168.9.6 enkbda1node06.enkitec.local    enkbda1node06" to /etc/hosts

After it completes, close this root session and go back to the oracle installation session. Then press ENTER key. The installation continues.

bds-exa-install: root script seem to have succeeded, continuing with setup bds
/bin/mkdir: created directory `/u01/app/oracle/product/12.1.0.2/dbhome_1/bigdatasql'
bds-exa-install: working directory         : /u01/app/oracle/product/12.1.0.2/dbhome_1/install
bds-exa-install: downloading JDK
bds-exa-install: working directory         : /u01/app/oracle/product/12.1.0.2/dbhome_1/install
bds-exa-install: installing JDK tarball
bds-exa-install: working directory         : /u01/app/oracle/product/12.1.0.2/dbhome_1/bigdatasql/jdk1.8.0_92/jre/lib/security
bds-exa-install: Copying JCE policy jars
/bin/mkdir: created directory `default_dir'
/bin/mkdir: created directory `bigdata_config'
/bin/mkdir: created directory `log'
/bin/mkdir: created directory `jlib'
bds-exa-install: working directory         : /u01/app/oracle/product/12.1.0.2/dbhome_1/bigdatasql/jlib
bds-exa-install: removing old oracle bds jars if any
bds-exa-install: downloading oracle bds jars
bds-exa-install: installing oracle bds jars
bds-exa-install: working directory         : /u01/app/oracle/product/12.1.0.2/dbhome_1/bigdatasql
bds-exa-install: downloading               : hadoop-2.6.0-cdh5.7.0.tar.gz
bds-exa-install: downloading               : hive-1.1.0-cdh5.7.0.tar.gz
bds-exa-install: unpacking                 : hadoop-2.6.0-cdh5.7.0.tar.gz
bds-exa-install: unpacking                 : hive-1.1.0-cdh5.7.0.tar.gz
bds-exa-install: working directory         : /u01/app/oracle/product/12.1.0.2/dbhome_1/bigdatasql/hadoop-2.6.0-cdh5.7.0/lib
bds-exa-install: downloading               : cdh-ol6-native.tar.gz
bds-exa-install: creating /u01/app/oracle/product/12.1.0.2/dbhome_1/bigdatasql/hadoop_enkbda.env for hdfs/mapred client access
bds-exa-install: working directory         : /u01/app/oracle/product/12.1.0.2/dbhome_1/bigdatasql
bds-exa-install: creating bds property files
bds-exa-install: working directory         : /u01/app/oracle/product/12.1.0.2/dbhome_1/bigdatasql/bigdata_config
bds-exa-install: created bigdata.properties
bds-exa-install: created  bigdata-log4j.properties
bds-exa-install: creating default and cluster directories needed by big data external tables
bds-exa-install: note this will grant default and cluster directories to public!
catcon: ALL catcon-related output will be written to /u01/app/oracle/product/12.1.0.2/dbhome_1/install/bdscatcon_catcon_387868.lst
catcon: See /u01/app/oracle/product/12.1.0.2/dbhome_1/install/bdscatcon*.log files for output generated by scripts
catcon: See /u01/app/oracle/product/12.1.0.2/dbhome_1/install/bdscatcon_*.lst files for spool files, if any
catcon.pl: completed successfully
bds-exa-install: granted default and cluster directories to public!
bds-exa-install: mta set to use listener end point : LISTENER
bds-exa-install: mta will be setup
bds-exa-install: creating /u01/app/oracle/product/12.1.0.2/dbhome_1/hs/admin/initbds_dbm_enkbda.ora
bds-exa-install: mta setting agent home as : /u01/app/oracle/product/12.1.0.2/dbhome_1/hs/admin
bds-exa-install: mta shutdown              : bds_dbm_enkbda
ORA-28593: agent control utility: command terminated with error
bds-exa-install: registering crs resource  : bds_dbm_enkbda
bds-exa-install: skipping crs registration on this instance
bds-exa-install: patching view LOADER_DIR_OBJS
catcon: ALL catcon-related output will be written to /u01/app/oracle/product/12.1.0.2/dbhome_1/install/bdscatcon_catcon_388081.lst
catcon: See /u01/app/oracle/product/12.1.0.2/dbhome_1/install/bdscatcon*.log files for output generated by scripts
catcon: See /u01/app/oracle/product/12.1.0.2/dbhome_1/install/bdscatcon_*.lst files for spool files, if any
catcon.pl: completed successfully
bds-exa-install: creating mta dblinks
bds-exa-install: cluster name              : enkbda
bds-exa-install: extproc sid               : bds_dbm_enkbda
bds-exa-install: cdb                       : true
catcon: ALL catcon-related output will be written to /u01/app/oracle/product/12.1.0.2/dbhome_1/install/bdscatcon_dbcluster_dropdblink_catcon_388131.lst
catcon: See /u01/app/oracle/product/12.1.0.2/dbhome_1/install/bdscatcon_dbcluster_dropdblink*.log files for output generated by scripts
catcon: See /u01/app/oracle/product/12.1.0.2/dbhome_1/install/bdscatcon_dbcluster_dropdblink_*.lst files for spool files, if any
catcon.pl: completed successfully
catcon: ALL catcon-related output will be written to /u01/app/oracle/product/12.1.0.2/dbhome_1/install/bdscatcon_default_dropdblink_catcon_388153.lst
catcon: See /u01/app/oracle/product/12.1.0.2/dbhome_1/install/bdscatcon_default_dropdblink*.log files for output generated by scripts
catcon: See /u01/app/oracle/product/12.1.0.2/dbhome_1/install/bdscatcon_default_dropdblink_*.lst files for spool files, if any
catcon.pl: completed successfully
catcon: ALL catcon-related output will be written to /u01/app/oracle/product/12.1.0.2/dbhome_1/install/bdscatcon_dbcluster_createdblink_catcon_388175.lst
catcon: See /u01/app/oracle/product/12.1.0.2/dbhome_1/install/bdscatcon_dbcluster_createdblink*.log files for output generated by scripts
catcon: See /u01/app/oracle/product/12.1.0.2/dbhome_1/install/bdscatcon_dbcluster_createdblink_*.lst files for spool files, if any
catcon.pl: completed successfully
catcon: ALL catcon-related output will be written to /u01/app/oracle/product/12.1.0.2/dbhome_1/install/bdscatcon_default_createdblink_catcon_388210.lst
catcon: See /u01/app/oracle/product/12.1.0.2/dbhome_1/install/bdscatcon_default_createdblink*.log files for output generated by scripts
catcon: See /u01/app/oracle/product/12.1.0.2/dbhome_1/install/bdscatcon_default_createdblink_*.lst files for spool files, if any
catcon.pl: completed successfully
catcon: ALL catcon-related output will be written to /u01/app/oracle/product/12.1.0.2/dbhome_1/install/bdscatcon_catcon_388232.lst
catcon: See /u01/app/oracle/product/12.1.0.2/dbhome_1/install/bdscatcon*.log files for output generated by scripts
catcon: See /u01/app/oracle/product/12.1.0.2/dbhome_1/install/bdscatcon_*.lst files for spool files, if any
catcon.pl: completed successfully
catcon: ALL catcon-related output will be written to /u01/app/oracle/product/12.1.0.2/dbhome_1/install/bdscatcon_catcon_388258.lst
catcon: See /u01/app/oracle/product/12.1.0.2/dbhome_1/install/bdscatcon*.log files for output generated by scripts
catcon: See /u01/app/oracle/product/12.1.0.2/dbhome_1/install/bdscatcon_*.lst files for spool files, if any
catcon.pl: completed successfully
bds-exa-install: setup script completed all steps
Step 4. Install kerberos related stuff
If BDA is not kerberosed, skip this step.
Logon as root user, and copy the krb5.conf file from BDA node 1
[root@enkx3db01 etc]# cp -p krb5.conf krb5.conf.orig
[root@enkx3db01 etc]# scp root@enkbda1node01:/etc/krb5.conf .
root@enkbda1node01's password:
krb5.conf                                           100%  888     0.9KB/s   00:00
Download krb5-workstation-1.10.3-57.el6.x86_64.rpm file and do the yum install on Exadata.
[root@enkx3db01 tmp]# yum localinstall krb5-workstation-1.10.3-57.el6.x86_64.rpm
Step 5: Verify Hadoop Access from Exadata
I used hive to verify whether Hadoop access is working or not on Exadata. If the BDA environment is non-kerberosed, skip the steps to do the kinit and klist.
The hive's principal is used for kinit and oracle@ENKITEC.KDC principal works as well.
[root@enkbda1node01 ~]# kinit hive
Password for hive@ENKITEC.KDC:
[root@enkbda1node01 ~]# klist
Ticket cache: FILE:/tmp/krb5cc_0
Default principal: hive@ENKITEC.KDC
Valid starting     Expires            Service principal
09/28/16 10:23:28  09/29/16 10:23:28  krbtgt/ENKITEC.KDC@ENKITEC.KDC
	renew until 10/05/16 10:23:28

[root@enkbda1node01 ~]# hive
hive> select count(*) from sample_07;
Query ID = root_20160928102323_f691ee8c-17f7-4ba8-af36-dad452bac458
Total jobs = 1
Launching Job 1 out of 1
Number of reduce tasks determined at compile time: 1
In order to change the average load for a reducer (in bytes):
  set hive.exec.reducers.bytes.per.reducer=<number>
In order to limit the maximum number of reducers:
  set hive.exec.reducers.max=<number>
In order to set a constant number of reducers:
  set mapreduce.job.reduces=<number>
Starting Job = job_1475025273405_0001, Tracking URL = http://enkbda1node04.enkitec.local:8088/proxy/application_1475025273405_0001/
Kill Command = /opt/cloudera/parcels/CDH-5.7.0-1.cdh5.7.0.p1464.1349/lib/hadoop/bin/hadoop job  -kill job_1475025273405_0001
Hadoop job information for Stage-1: number of mappers: 1; number of reducers: 1
2016-09-28 10:24:11,810 Stage-1 map = 0%,  reduce = 0%
2016-09-28 10:24:20,134 Stage-1 map = 100%,  reduce = 0%, Cumulative CPU 1.94 sec
2016-09-28 10:24:25,280 Stage-1 map = 100%,  reduce = 100%, Cumulative CPU 4.27 sec
MapReduce Total cumulative CPU time: 4 seconds 270 msec
Ended Job = job_1475025273405_0001
MapReduce Jobs Launched:
Stage-Stage-1: Map: 1  Reduce: 1   Cumulative CPU: 4.27 sec   HDFS Read: 52641 HDFS Write: 4 SUCCESS
Total MapReduce CPU Time Spent: 4 seconds 270 msec
OK
823
Time taken: 28.544 seconds, Fetched: 1 row(s)

hive> select * from sample_07 limit 10;
OK
00-0000	All Occupations	134354250	40690
11-0000	Management occupations	6003930	96150
11-1011	Chief executives	299160	151370
11-1021	General and operations managers	1655410	103780
11-1031	Legislators	61110	33880
11-2011	Advertising and promotions managers	36300	91100
11-2021	Marketing managers	165240	113400
11-2022	Sales managers	322170	106790
11-2031	Public relations managers	47210	97170
11-3011	Administrative services managers	239360	76370
Time taken: 0.054 seconds, Fetched: 10 row(s)
hive> quit;
[root@enkbda1node01 ~]#
Check hadoop from Oracle database. Run the following SQLs in SQLPlus. You can see BDSQL is installed under $ORACLE_HOME/bigdatasql directory.
set lines 150
col OWNER for a10
col DIRECTORY_NAME for a25
col DIRECTORY_PATH for a50
select OWNER, DIRECTORY_NAME, DIRECTORY_PATH  from dba_directories where directory_name like '%BIGDATA%';

SQL> SQL> SQL>
OWNER      DIRECTORY_NAME            DIRECTORY_PATH
---------- ------------------------- --------------------------------------------------
SYS        ORA_BIGDATA_CL_enkbda
SYS        ORACLE_BIGDATA_CONFIG     /u01/app/oracle/product/12.1.0.2/dbhome_1/bigdatas
                                     ql/bigdata_config
Create a bds user in Oracle database. This is the user I can test whether I can query hive table from SQLPlus.
SQL> create user bds identified by bds;
User created.
SQL> grant connect , resource to bds;
Grant succeeded.
Create a few tables like sample_07 and sample_08. Both tables exists in Hive on BDA.
CREATE TABLE sample_07 (  code VARCHAR2(4000),  description VARCHAR2(4000),
total_emp NUMBER,  salary NUMBER)  ORGANIZATION EXTERNAL
 (TYPE ORACLE_HIVE
DEFAULT DIRECTORY DEFAULT_DIR
 ACCESS PARAMETERS
(
com.oracle.bigdata.cluster=enkbda
com.oracle.bigdata.tablename=default.sample_07)
) PARALLEL 2 REJECT LIMIT UNLIMITED;
Several other useful queries to query hive metadata from SQLPlus:
set lines 150
set pages 999
col cluster_id for a20
col database_name for a8
col table_name for a15
col location for a20
col owner for a8
col table_type for a8
col input_format for a20
col hive_uri for a25
select cluster_id, database_name, table_name, location,
owner, table_type, input_format, hive_uri
from all_hive_tables
order by owner, table_name;

CLUST  DATABASE TABLE_NAME      LOCATION             OWNER    TABLE_TY INPUT_FORMAT         HIVE_URI
------ -------- --------------- -------------------- -------- -------- -------------------- -------------------------
enkbda default  sample_07       hdfs://enkbda-ns/use hive     MANAGED_ org.apache.hadoop.ma thrift://enkbda1node0
                                r/hive/warehouse/sam          TABLE    pred.TextInputFormat 4.enkitec.local:9083
                                ple_07

col partitioned for a15
SELECT cluster_id, database_name, owner, table_name, partitioned FROM all_hive_tables;

CLUSTER_ID   DATABASE OWNER    TABLE_NAME      PARTITIONED
------------ -------- -------- --------------- ---------------
enkbda       default  hive     sample_07       UN-PARTITIONED


col column_name for a20
col hive_column_type for a20
col oracle_column_type for a15
SELECT table_name, column_name, hive_column_type, oracle_column_type
FROM all_hive_columns;

TABLE_NAME      COLUMN_NAME          HIVE_COLUMN_TYPE     ORACLE_COLUMN_T
--------------- -------------------- -------------------- ---------------
sample_07       code                 string               VARCHAR2(4000)
sample_07       description          string               VARCHAR2(4000)
sample_07       total_emp            int                  NUMBER
sample_07       salary               int                  NUMBER

4 rows selected.
Ok, let me get some rows from sample_07 table.
oracle:dbm1@enkx3db01 bdsql > sqlplus bds/bds
SQL> select * from bds.sample_07;
select * from bds.sample_07
*
ERROR at line 1:
ORA-29913: error in executing ODCIEXTTABLEOPEN callout
ORA-29400: data cartridge error
ORA-28575: unable to open RPC connection to external procedure agent
After some investigation, I realized the above error was caused by a weird requirement of BDSQL installation: the installation must be done on ALL db nodes on Exadata before accessing Hive table on BDA. Not a big deal. I performed the installation from Step 1 to Step 4 on DB node 2 on Exadata. After the completion, I bounced BDSQL on BDA using the
following commands as root user:
bdacli stop big_data_sql_cluster
bdacli start big_data_sql_cluster
Step 6: Final Verification
After BDSQL was installed on db node 2 and BDSQL was bounced on BDA, I was able to query the sample_07 table from SQLPlus.
SQL> select * from sample_07 where rownum < 3;
CODE
--------------------------------------------------------------------------------
DESCRIPTION
--------------------------------------------------------------------------------
 TOTAL_EMP     SALARY
---------- ----------
00-0000
All Occupations
 134354250	40690

11-0000
Management occupations
   6003930	96150

SQL> select count(*) from sample_07;

  COUNT(*)
----------
       823
Cool, BDSQL is working on Exadata.
A few more tips
If stopping the database that has BDSQL installed, you will see the following message when stopping the db.
oracle:dbm1@enkx3db01 ~ > srvctl stop database -d dbm
PRCR-1133 : Failed to stop database dbm and its running services
PRCR-1132 : Failed to stop resources using a filter
CRS-2529: Unable to act on 'ora.dbm.db' because that would require stopping or relocating 'bds_dbm_enkbda', but the force option was not specified
CRS-2529: Unable to act on 'ora.dbm.db' because that would require stopping or relocating 'bds_dbm_enkbda', but the force option was not specified
The reason is that BDSQL installation created a new resource bds_dbm_enkbda that is running on both all db nodes. We can see the resource from crsctl status resource command.
oracle:+ASM1@enkx3db01 ~ > crsctl status resource -t
--------------------------------------------------------------------------------
Name           Target  State        Server                   State details
--------------------------------------------------------------------------------
Local Resources
--------------------------------------------------------------------------------
ora.DATAC1.dg
               ONLINE  ONLINE       enkx3db01          STABLE
               ONLINE  ONLINE       enkx3db02          STABLE
ora.DBFS_DG.dg
               ONLINE  ONLINE       enkx3db01          STABLE
               ONLINE  ONLINE       enkx3db02          STABLE
ora.LISTENER.lsnr
               ONLINE  ONLINE       enkx3db01          STABLE
               ONLINE  ONLINE       enkx3db02          STABLE
ora.RECOC1.dg
               ONLINE  ONLINE       enkx3db01          STABLE
               ONLINE  ONLINE       enkx3db02          STABLE
ora.asm
               ONLINE  ONLINE       enkx3db01          Started,STABLE
               ONLINE  ONLINE       enkx3db02          Started,STABLE
ora.net1.network
               ONLINE  ONLINE       enkx3db01          STABLE
               ONLINE  ONLINE       enkx3db02          STABLE
ora.ons
               ONLINE  ONLINE       enkx3db01          STABLE
               ONLINE  ONLINE       enkx3db02          STABLE
--------------------------------------------------------------------------------
Cluster Resources
--------------------------------------------------------------------------------
bds_dbm_enkbda
      1        ONLINE  ONLINE       enkx3db01          STABLE
      2        ONLINE  ONLINE       enkx3db02          STABLE
ora.LISTENER_SCAN1.lsnr
      1        ONLINE  ONLINE       enkx3db02          STABLE
ora.LISTENER_SCAN2.lsnr
      1        ONLINE  ONLINE       enkx3db01          STABLE
ora.LISTENER_SCAN3.lsnr
      1        ONLINE  ONLINE       enkx3db01          STABLE
ora.MGMTLSNR
      1        ONLINE  ONLINE       enkx3db01          169.254.33.130 192.1
                                                       68.10.1 192.168.10.2
                                                        ,STABLE
ora.cvu
      1        ONLINE  ONLINE       enkx3db01          STABLE
ora.dbm.db
      1        ONLINE  ONLINE       enkx3db01          Open,STABLE
      2        ONLINE  ONLINE       enkx3db02          Open,STABLE
ora.enkx3db01.vip
      1        ONLINE  ONLINE       enkx3db01          STABLE
ora.enkx3db02.vip
      1        ONLINE  ONLINE       enkx3db02          STABLE
ora.mgmtdb
      1        ONLINE  ONLINE       enkx3db01          Open,STABLE
ora.oc4j
      1        ONLINE  ONLINE       enkx3db01          STABLE
ora.scan1.vip
      1        ONLINE  ONLINE       enkx3db02          STABLE
ora.scan2.vip
      1        ONLINE  ONLINE       enkx3db01          STABLE
ora.scan3.vip
      1        ONLINE  ONLINE       enkx3db01          STABLE
--------------------------------------------------------------------------------
So to shutdown the dbm database, need to run crsctl stop resource bds_dbm_enkbda command first.
This resource is actually an agent for BDSQL. Running ps command can see this agent.
oracle:dbm2@enkx3db02 ~ > ps -ef|grep bds
oracle    21046   1945  0 11:42 pts/1    00:00:00 grep bds
oracle   367388      1  0 11:19 ?        00:00:02 extprocbds_dbm_enkbda -mt
If running the following lsnrctl, you should be able see 30 handlers for bds.
lsnrctl status | grep bds








You must be logged in to post a comment.